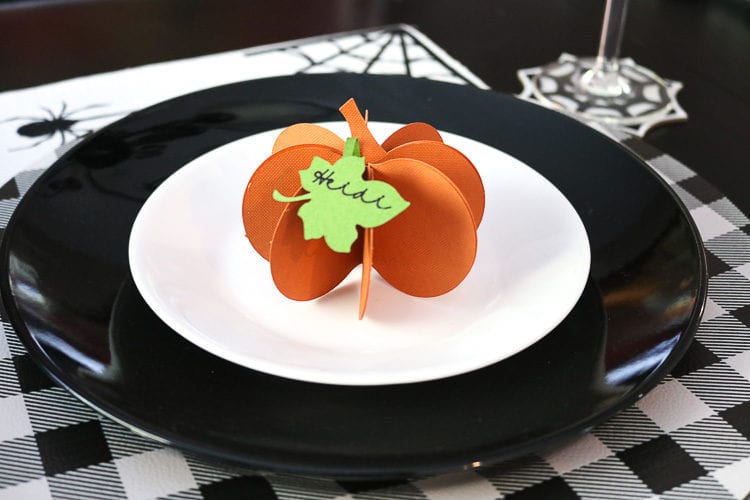
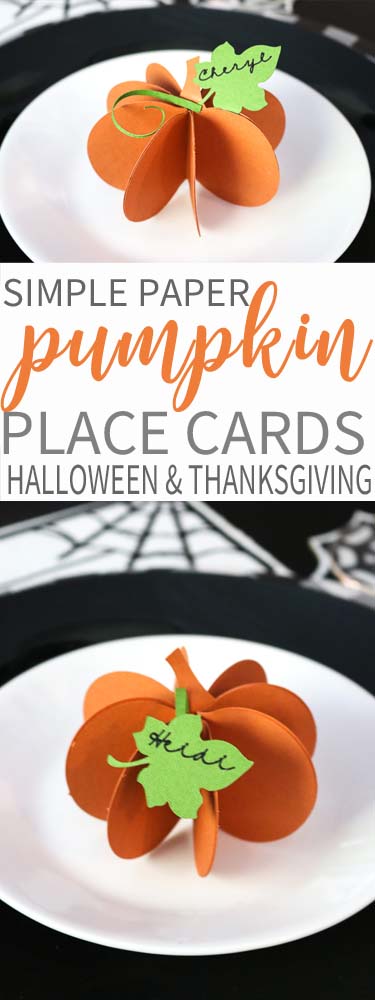
Whether you are throwing a Halloween party or hosting Thanksgiving Dinner, these pumpkin place cards are so cute and classy! These can be easily made with your Cricut or Silhouette cutting machines or even the new xTool Hybrid Laser & Blade Cutter! The best part is you can easily swap out the leaves with the names and use these pumpkins over and over again!
This post may contain links to Amazon Associates and other affiliates.
As an Amazon affiliate, I earn a small commission from these links at no additional cost to you.
UPDATE:
Cricut has removed this image from Cricut Design Space and after so many of you have requested it, I have recreated it in Adobe Illustrator and it is available for free download below! Please see the directions below on how to set the score lines for each a Cricut and Silhouette cutting machine.
If you are using a Cricut to create these cute pumpkin place cards you can utilize the scoring tool (Joy or Explore models) or the single scoring wheel (Maker family). You will need to change the LINES layer from cut to score and then ATTACH it to the Pumpkin Shapes.
If you are using a Silhouette Machine to make this project, you will need to change the LINES layer to a color different from the cut lines and then select that color and change to “score” and adjust your blade if necessary.
You can also make these without scoring and just use a scoring board like this one from EK Tools
This post may contain links to Amazon Associates and other affiliates.
As an Amazon affiliate, I earn a small commission from these links at no additional cost to you.
Supplies for Pumpkin Place Cards:
- Cutting Machines such as a Cricut Maker, Cricut Explore, Cricut Joy, Silhouette Cameo or xTool M1
- Scoring Wheel
- Scoring Stylus if using Explore or Joy model)
- Cardstock (Nature Sampler)
- Tape runner
- Black Fine Point Cricut Pen
Customize Pumpkin Place Cards:
You can find this design by searching #M6A4C5F3 or you can use my file here.
If you open my file, make sure to select CUSTOMIZE as you will want to change the names from my friends to yours! Unless you want my friends at your dinner party, which is totally cool because they are super awesome {wink}.
Duplicate if you need more place cards or delete if you need fewer. My file is for 4 place settings.
For this project, I used the blue mat that came with my Maker.
The Nature Cardstock Sampler has 2 colors orange it in. Choose your favorite! You will also need a sheet of green for the stem/leaf.
Get the Pumpkin Place Card File Here
Getting the freebie is easy! First, enter your email below to join my email community (AND gain access to my freebie library)!! After that, check your email for the files!
I use box.com to deliver my freebies safely!
There is no need to sign up for a box.com account!
Please see this FAQ post + Video on how to download my freebies.
This download is for personal use only!
How to Cut & Write Pumpkin Place Cards
Time needed: 10 minutes
Create adorable pumpkin place cards that are perfect for Halloween or Thanksgiving tables! Utilize the Cut, Score, and Write features on your Cricut cutting machine.
- Upload the File into your design software
–How to Upload Files into Cricut Design Space
–How to Upload Files into Silhouette Studio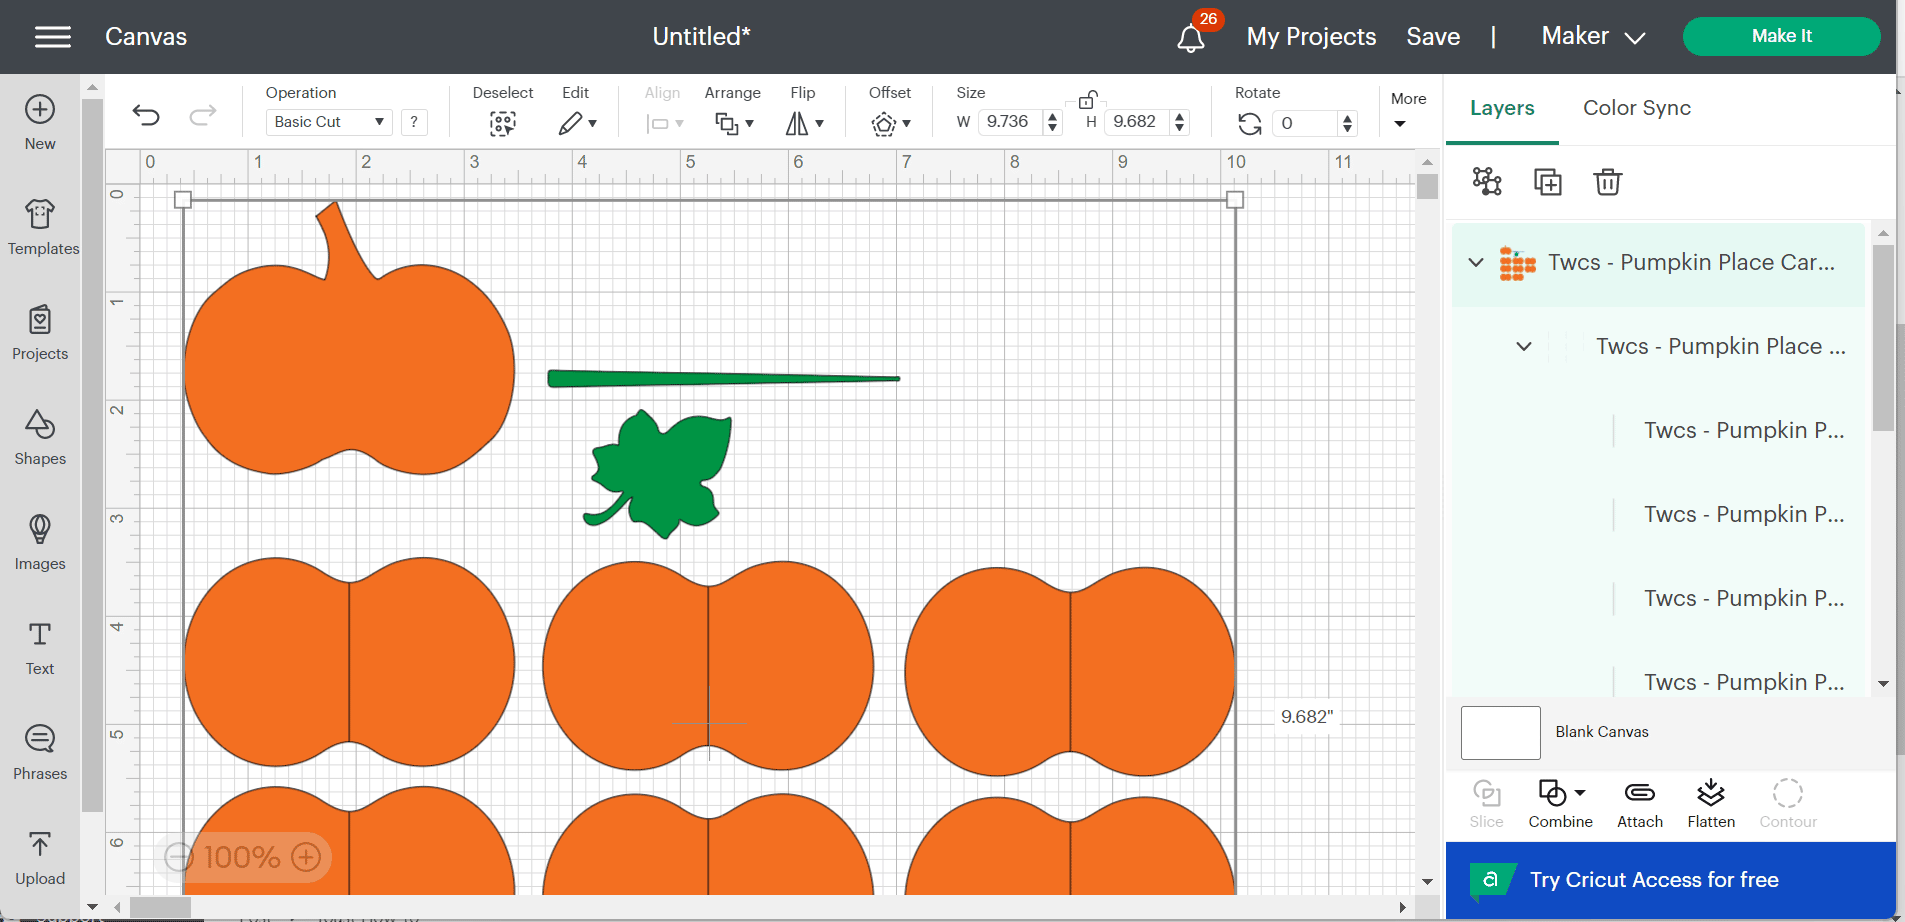
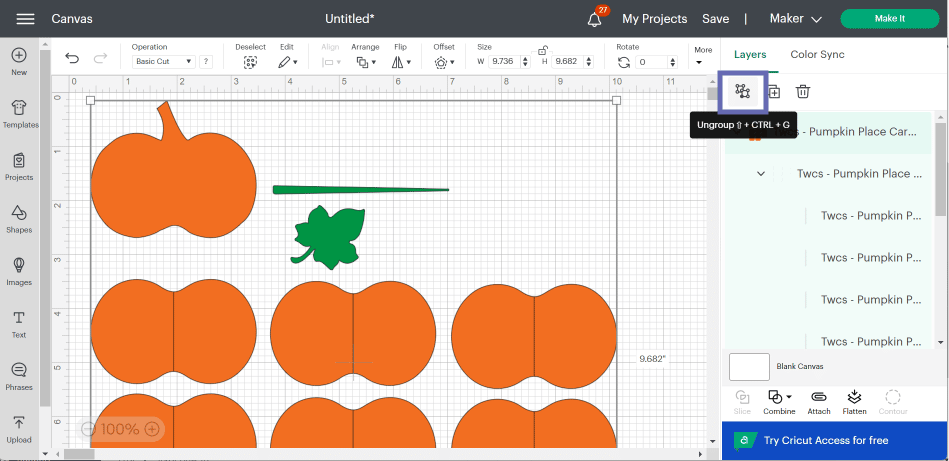
- Ungroup Layers
The design uploads as a group and since we need to change the cut lines to score, we must first ungroup. Select the entire upload in the layers panel and click the ungroup button.
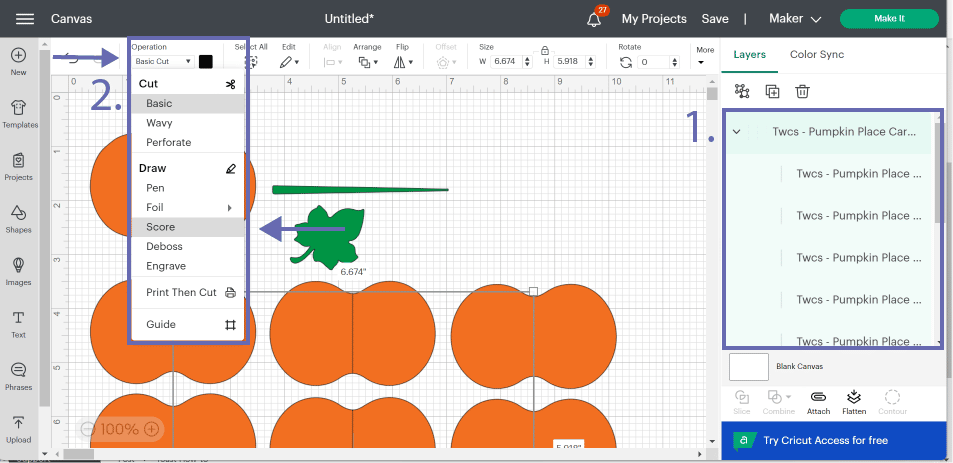
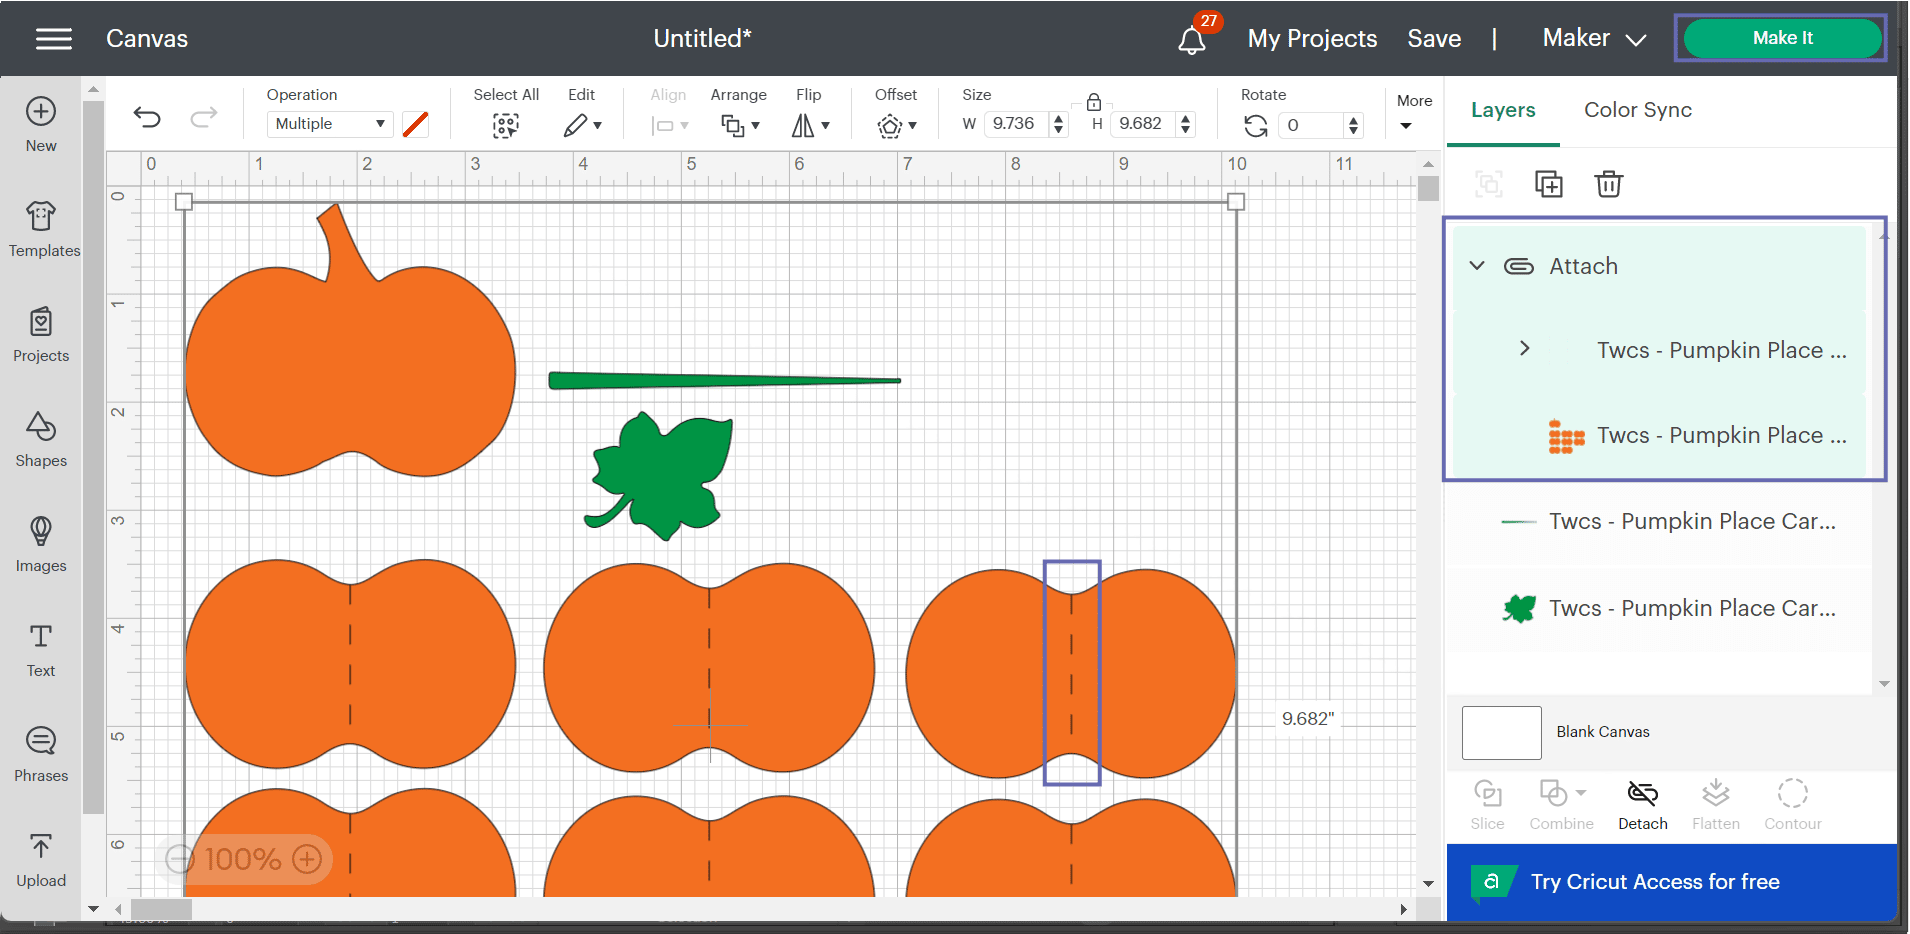
- Change Lines from Cut to Score
First, you are going to select the layer that contains all the vertical black lines and then you will go up to the Operation Dropdown and change that from Basic Cut to Score.
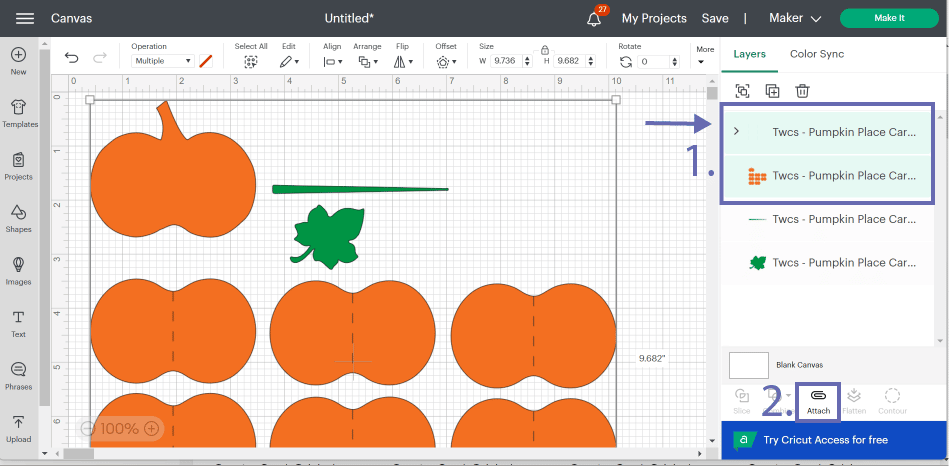
- Attach the Score Lines to the Pumpkins
Now we have to tell CDS where to score and to do that, we will select both the score lines layer and the pumpkins layer and click the ATTACH button.
- Add Names
First, select the Text Tool and add a text box to the canvas. Add the name you wish to use, then go up to the Operations Dropdown and select PEN. Next, change Style to WRITING and then choose your font. Adjust the name to fit the leaf.

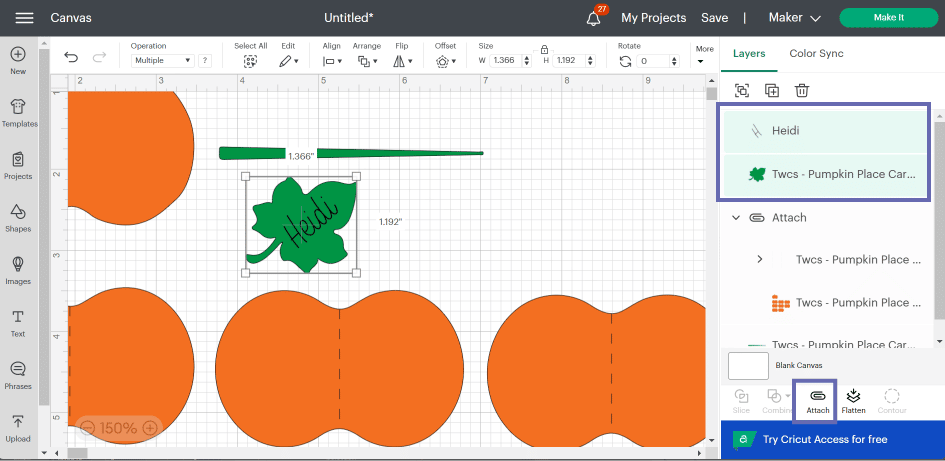
- Attach Name to Leaf
Just like the score lines, we now need to tell CDS where to write the name so we need to attach them together. Select both the text layer and the leaf layer and click the ATTACH button.
- Duplicate and Change Names
This is for one pumpkin so if you need several place settings, now is the time to select ALL LAYERS and click the DUPLICATE tool for as many place cards as you need. Then go back and change the names accordingly.
- Click Make it
Notice now, the two layers are under an ATTACH label and the solid lines have turned to dashed score lines. Click the Make It button in the upper right-hand corner.
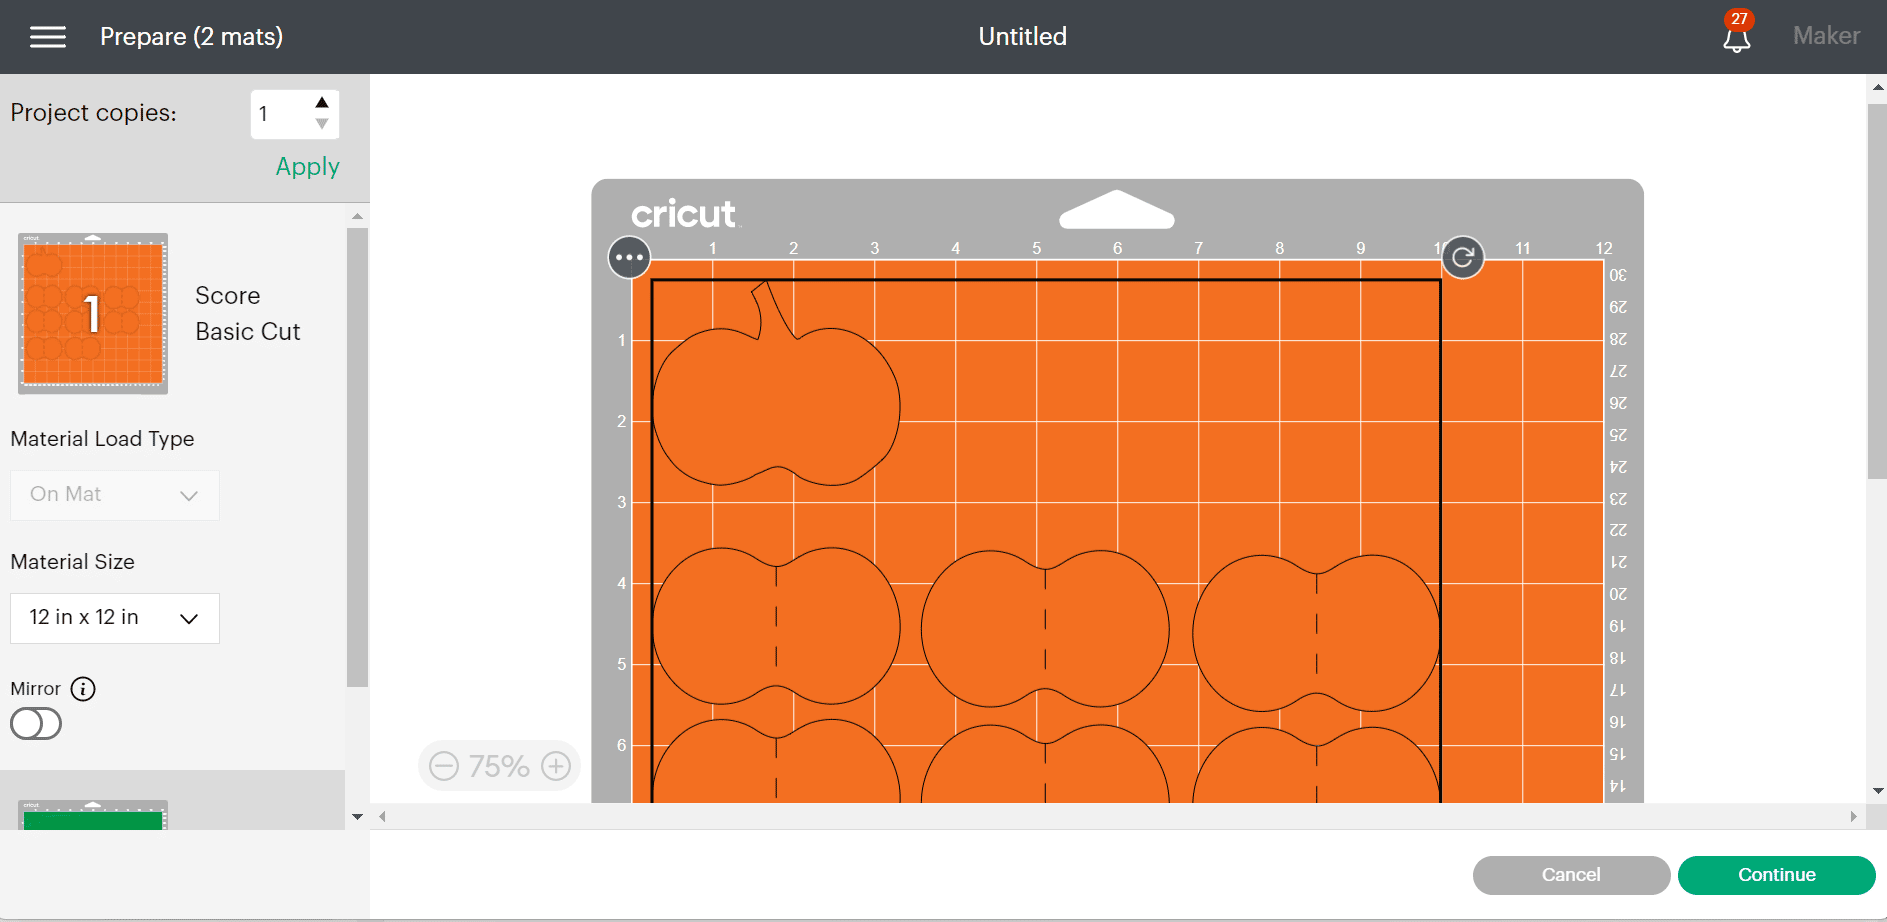
- Cut The Cardstock
First select how you will cut (Mat, No Mat, Card Mat) I chose the Mat option. Then you will get the Mat screen and everything looks great! Click Continue in the lower right corner. Connect your machine, select your material (cardstock), ensure the fine tip blade is there, and cut! When you get to the green mat you will insert your pen and draw then cut. You can find more about using Cricut Pens here.
TIP: When your project is finished cutting, remove your mat and bend/roll the mat. This helps release the shapes from your mat to make them easier to remove!
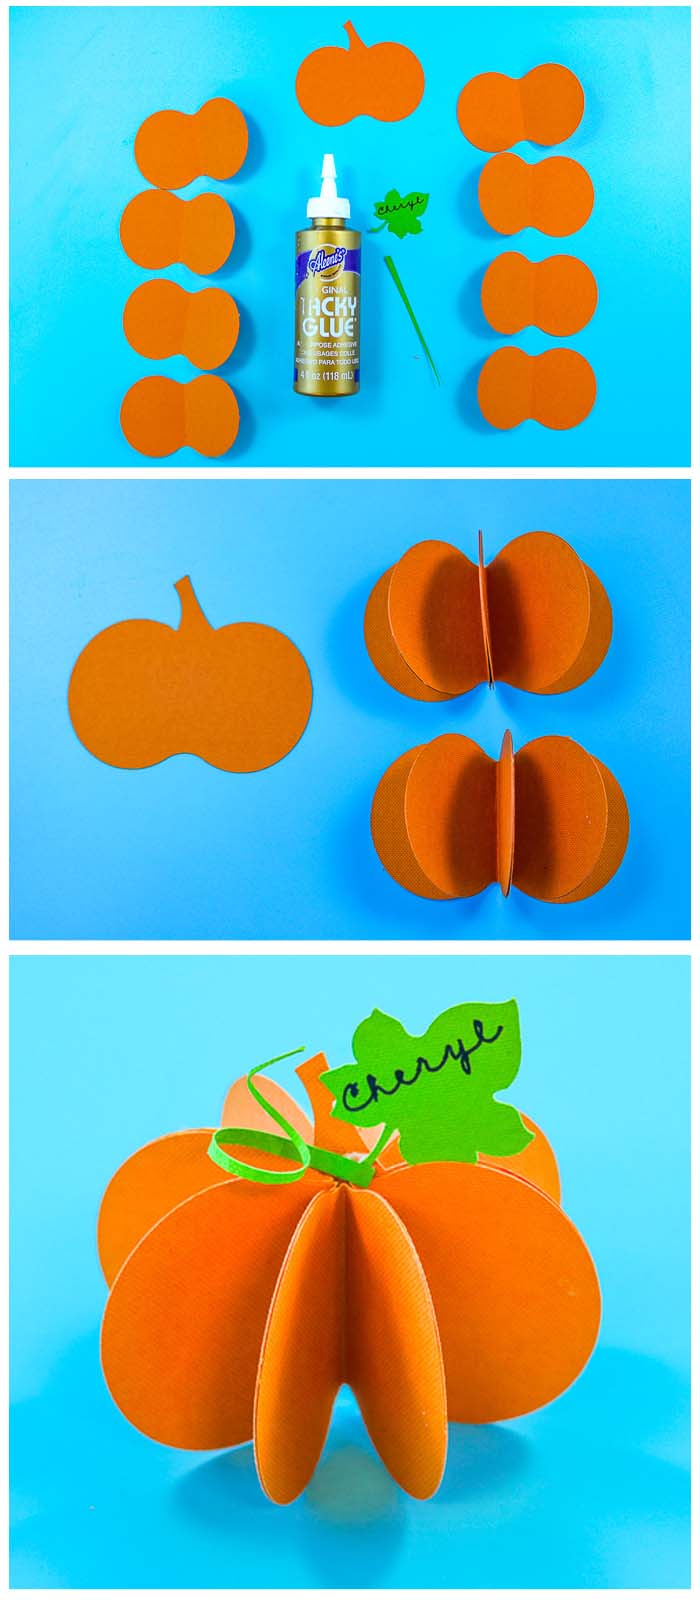
How to Assemble Pumpkin Place Cards:
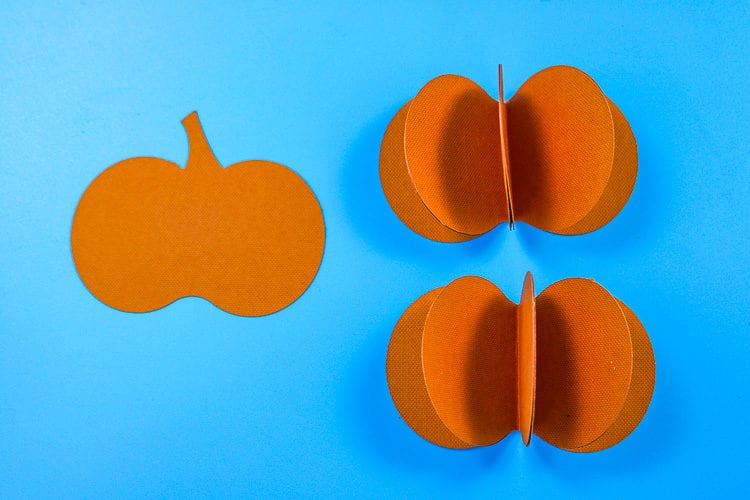
There are eight pumpkin body shapes and one full pumpkin. Start by folding the pumpkin body shapes along the scoreline.
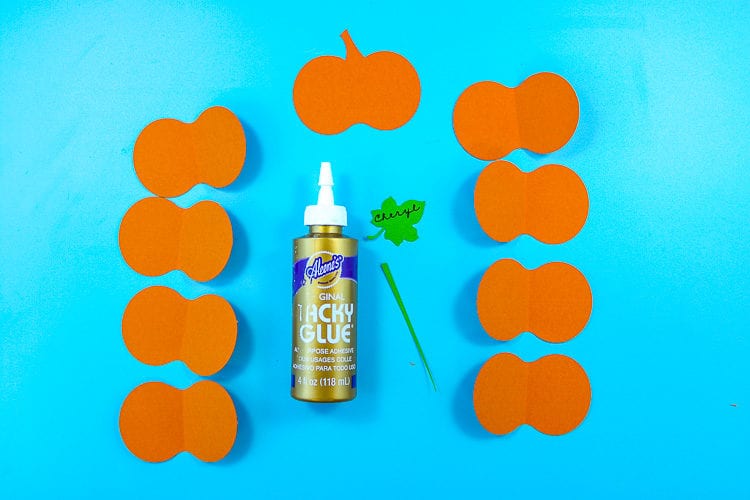
Note: The Nature Sampler pack has one side of the cardstock with texture. Make sure you are folding your pumpkins in the same direction so that the texture is in the same direction.
Once folded use a tape runner or tacky glue to assemble 4 of the pumpkin body pieces together, repeat with the remaining 4 so that you have 2 half pumpkins.
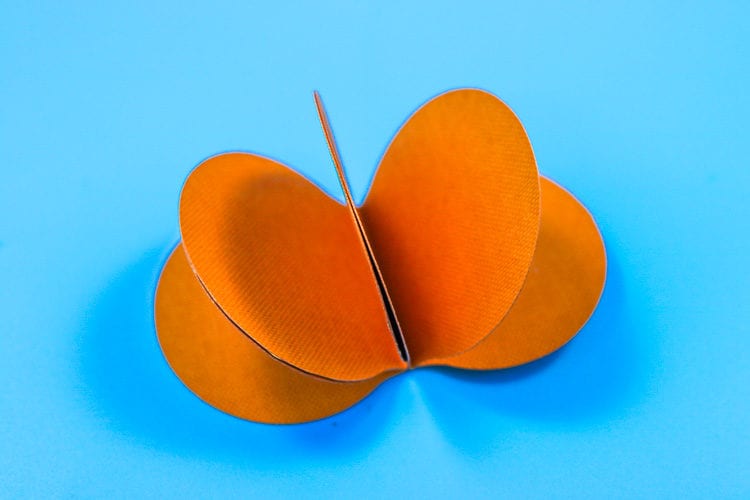
Adhere both halves onto the complete pumpkin piece.
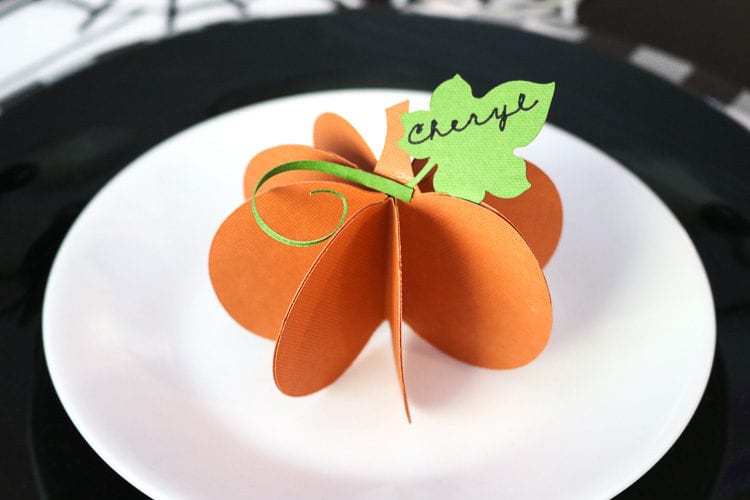
For the leaf and stem, I curled the stem piece around a pen and then used a dab of tacky glue to adhere it to the paper pumpkin and then another dab to glue on the leaf.
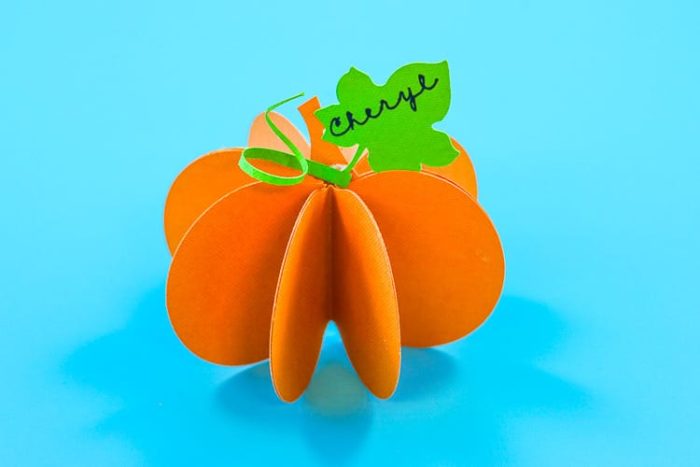
This little pumpkin can work both for Halloween and Thanksgiving! It will be your go-to fall place card! These would even be cute just as table decor or on your mantel. You can resize them and make a whole family like my Clay Pot Pumpkin Family!
More Halloween Goodness Here


More Perfect Thanksgiving Day Table Items:
- Turkey Napkin Rings (from faux flowers)
- Turkey Place Cards
- Thankful Table Runner
- Turkey Snack Bags (great for the kids table!)
More Thanksgiving Fun Here


")

If you want to learn other great things your Cricut can do, you can find my entire Cricut Page Here and I urge you to join my Email Community! You will get new tips and tricks delivered to your inbox for free!
PIN PUMPKIN PAPER PLACE CARDS


Comments & Reviews
Kelly Rogers says
When I click your link and it opens in Design Space it always says exclusive content and the make it button is not able to be clicked. Is there something more I need to do?
Thank you,
Kelly
Cheryl Spangenberg says
Ugh, Kelly you certainly don’t have to do anything more. Cricut did something with design space and that made all my links invalid and I have not had a chance to get to them all. Let me try to fix this one and I will let you know! So sorry about that and thanks for letting me know.
Cheryl Spangenberg says
Update Kelly: It appears that shape is no longer in Design Space! I will have to create my own and I will add it. Sorry for the confusion, I had no idea they took stuff out of design space!
Cheryl Spangenberg says
Kelly, I have added a free download since there were still some problems using the project link!
Karen says
I downloaded the pumpkin placecard into design space. I customized but when I tried to print it I get the following response “This item is not for sale”. Is there something I am doing wrong? Karen
Cheryl Spangenberg says
Karen, I have added a free download since there were still some problems using the project link!
Nicky says
Hi there,
I love this design and would love to make it but it is saying that its unable to purchase in design space. Is there anything that I can do?
Cheryl Spangenberg says
Nicky I have added a free download since there were still some problems using the project link!
Patricia C. says
I would like to do the pumpkin place cards set, but I don’t have a cricut (or any) machine. Do you possibly have this in PDF or PNG?
Cheryl Spangenberg says
I don’t Patricia since this was a Cricut Access Design.
Cheryl Spangenberg says
Patricia, I have added a free download that contains a png file!
Peni says
Hi Cheryl, I have a maker 3. Is this project available in Cricut design space?
Cheryl Spangenberg says
Hi Peni, it was a design space design but they seem to have removed it. If you use my project file, you should still be able to use it! Open this link in Cricut Design Space ( https://design.cricut.com/landing/project-detail/5bdc8b01082f2606244ff455) then click Customize!
Cheryl Spangenberg says
Peni I have added a free download since there were still some problems using the project link!
Karen says
I have a ton of 8.5 x 11 paper to use, but the Design Space won’t let me ungroup the pumpkin shapes and won’t let me move them around to fit onto my paper. User error perhaps? Thanks.
Cheryl Spangenberg says
Hi Karen,
That is my fault for how I grouped the designs when I re-created them. I just updated them so now you can ungroup and move them around! Hope that helps!