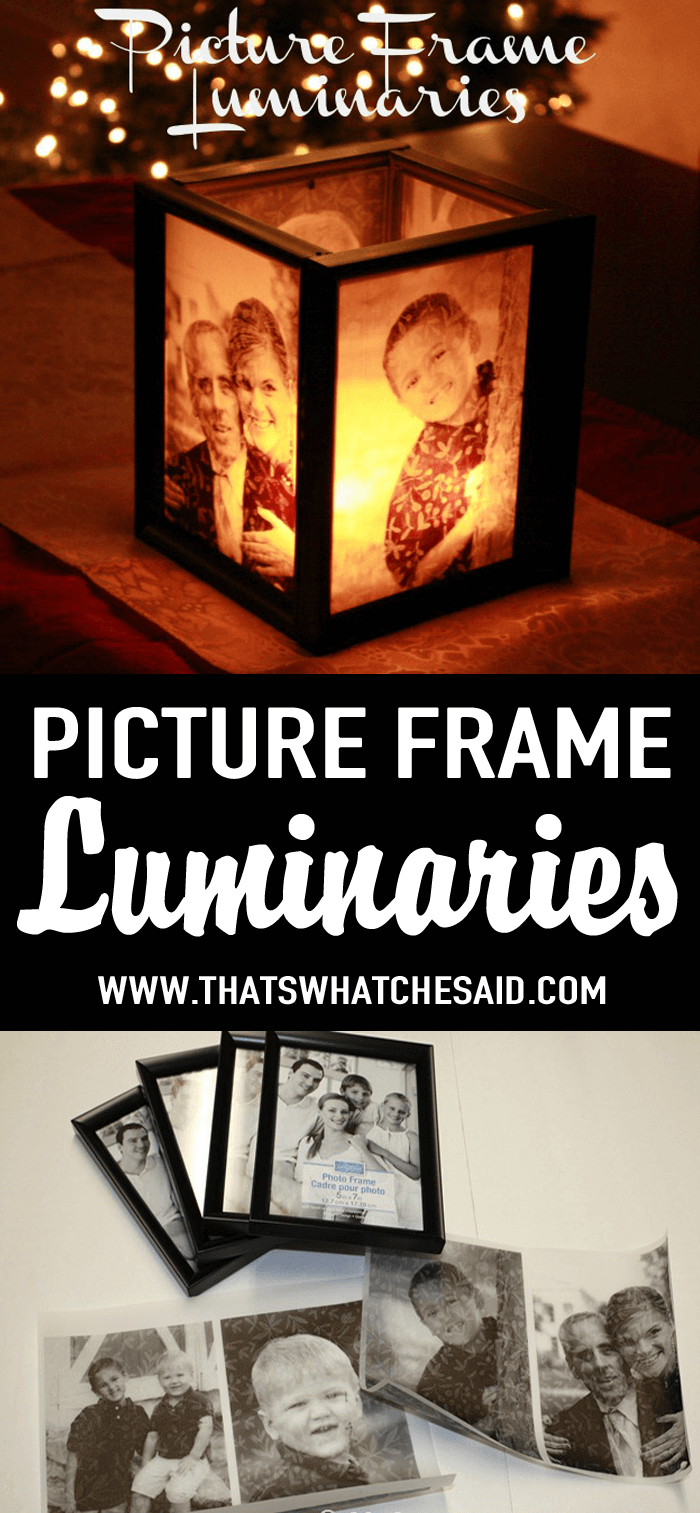
Need to create a meaningful project that is perfect for holidays, celebrations, centerpieces, and more? These Picture Frame Luminaries are your answer! A wonderful handmade gift, keepsake, or decorations for receptions or showers! Highly personal and highly customizable! With the majority of supplies from the dollar store, they are inexpensive as well!
I am REALLY, REALLY excited to share these picture frame luminaries with you today. They are perfect for your dining table or mantel.
They work wonderfully for events like wedding or baby showers, receptions, and graduations! Really…any time of the year! I am pretty sure I will find a place for this year-round! :) Last year I shared my wine bottle luminaries…I tend to like things that light up during the holidays!!!
This post may contain links to Amazon Associates and other affiliates.
As an Amazon affiliate, I earn a small commission from these links at no additional cost to you.
Supplies for Picture Frame Luminaries:
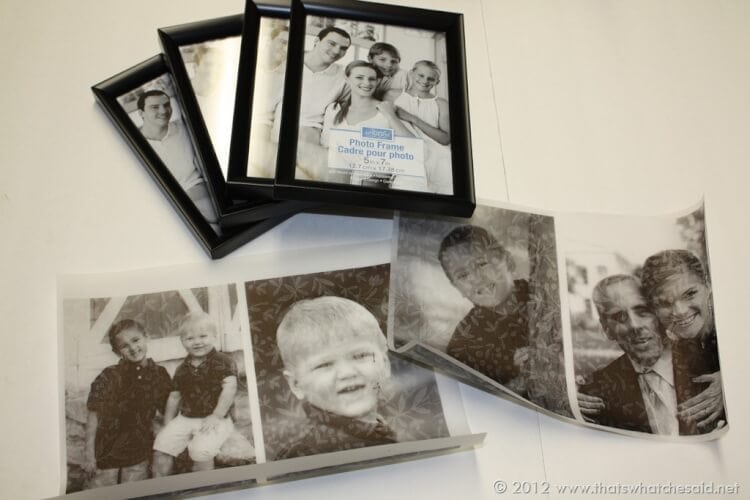
- 4) 5 x 7 frames (I found mine at my local Dollar Tree)*
- Gorilla Glue or super glue
- 2 sheets of 8.5 x 11 Vellum ( solid or patterned )
- Home printer – I use the HP Envy 5540 Wireless All-In-One Printer and signed up for HP Instant Ink.
- Family photos
- Square mirror
- LED Candles
*It’s important when choosing frames that you choose ones with square flat edges and frames where the little pegs are on the FRAME not part of the cardboard backing since we are not using the backings.
Don’t Miss Out!
Get quick crafts, easy recipes and free printables & cut files straight to your inbox! You won’t want to miss a thing! Join now!
HOW TO MAKE PHOTO LUMINARIES:
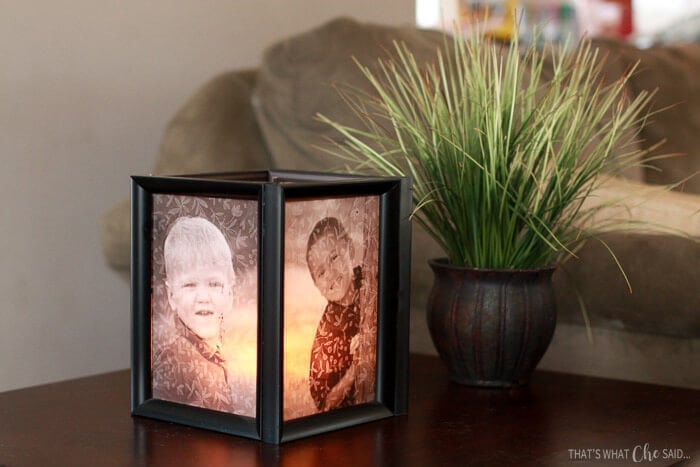
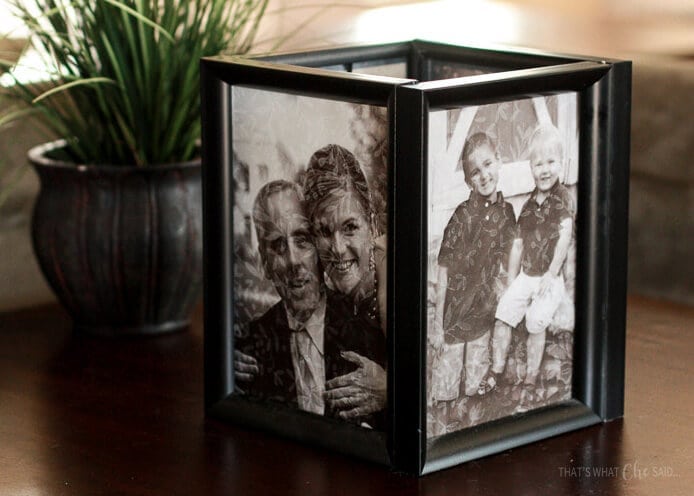
I started off by finding four photos that I wanted to feature on my centerpiece. I took some photos of my boys in August and so I used one of Michael, one of Ryan, one of both of the boys and then I had to dig back to the really, really archives and dig out a photo of Fred and I …FROM OUR WEDDING…(in 2008) because apparently, that is the LAST time we took a decent photo together (read: that is the last time I was not BEHIND The camera taking the pictures!).
I bought two pieces of vellum at Michael’s. You can find it in the open scrapbooking paper section or I linked to packages of it above. (In case you don’t want to leave the house or have multiple to make!)
It looks like wax paper (opaqueness) but not waxy! It’s awesome. The only vellum I could find had a print through it. I thought “Hey what will this faint vine print do to my photos…probably nothing”…WRONG! It shows through! (as you can see the vine pattern in the photo above) So I linked to both solid and patterned vellums above. Your choice. I was happy with the surprise after I made it!
I printed my photos on my home printer directly onto my vellum…and then I trimmed them down to size.
I took out the happy family that was in the dollar store frames and I replaced it with our family photo printed on vellum…ON TOP of the GLASS! So it goes frame face down, vellum photo face down and then glass on last. You don’t not use the frame backing at all. I did this so that when you place the candles inside…you don’t risk lighting your house on fire! Just sayin…kind of important!
Once in your frames, glue them together into a cube. NOTE: Gorilla glue (which is what I used) expands when it dries…so be sure to apply a thin line and towards the inner side of the joint.
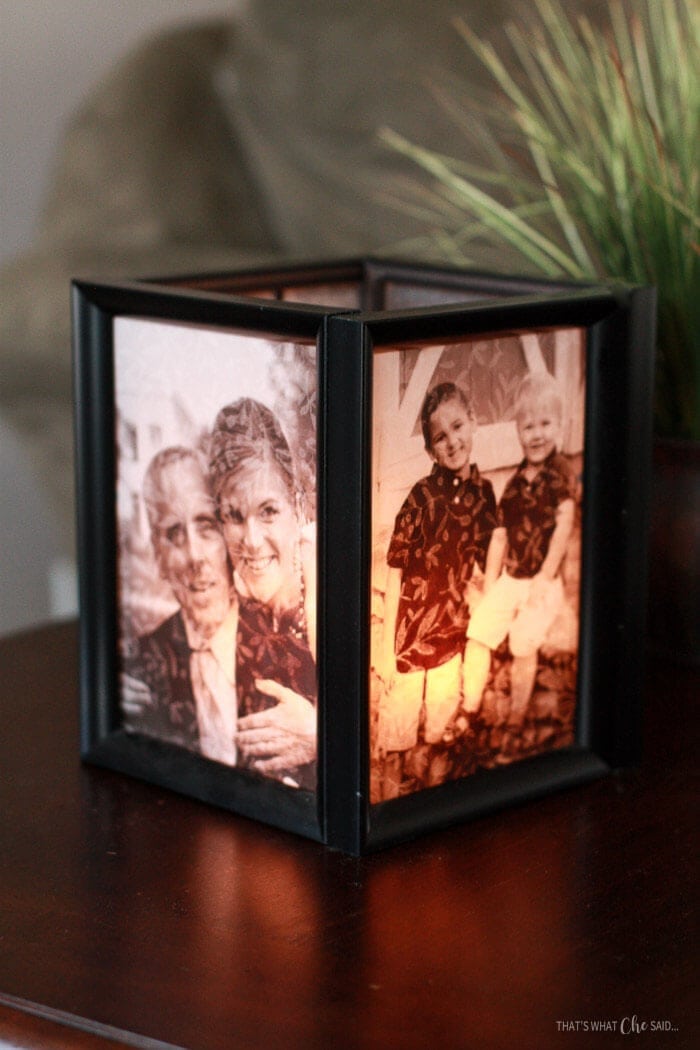
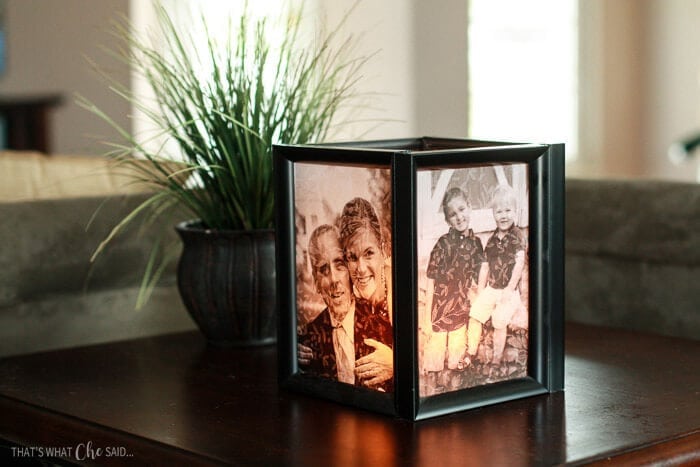
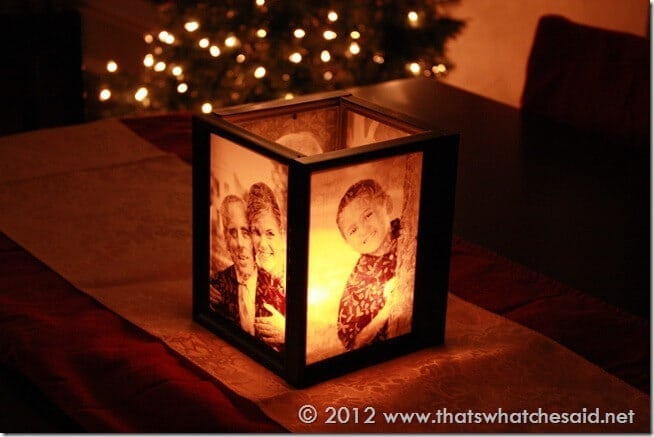
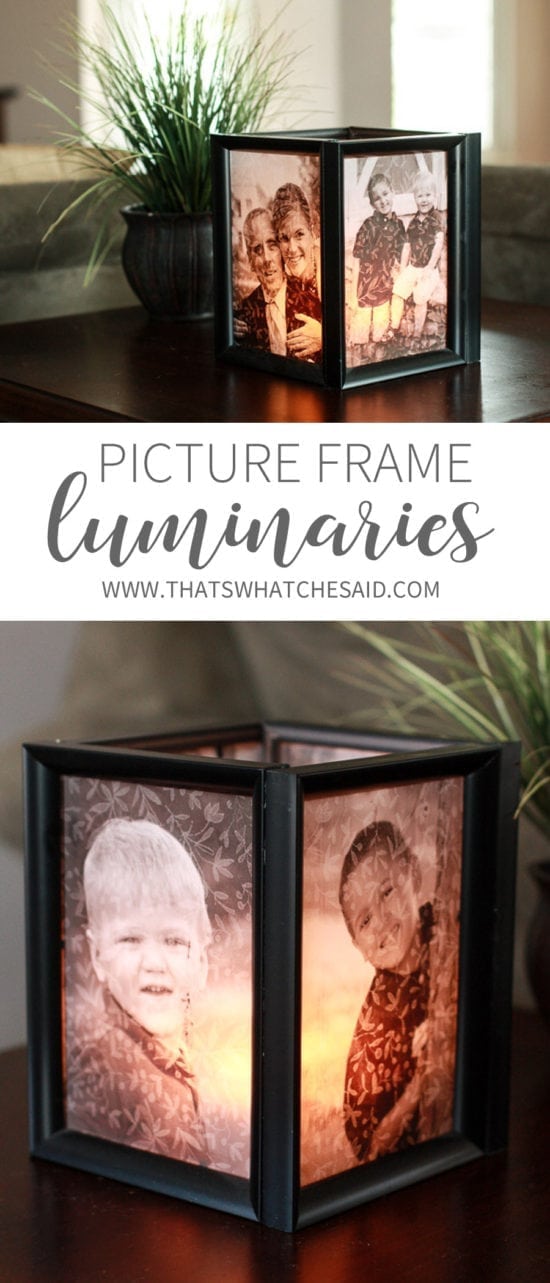
Then you are ready to assemble your centerpiece. Simply put the cube frame over the square mirror. This will help reflect the light from your votive making the photos clearer and more prominent. Then place the votive inside and light!
Even when not lit, it’s still a focal piece and something everyone comments on when they come over!
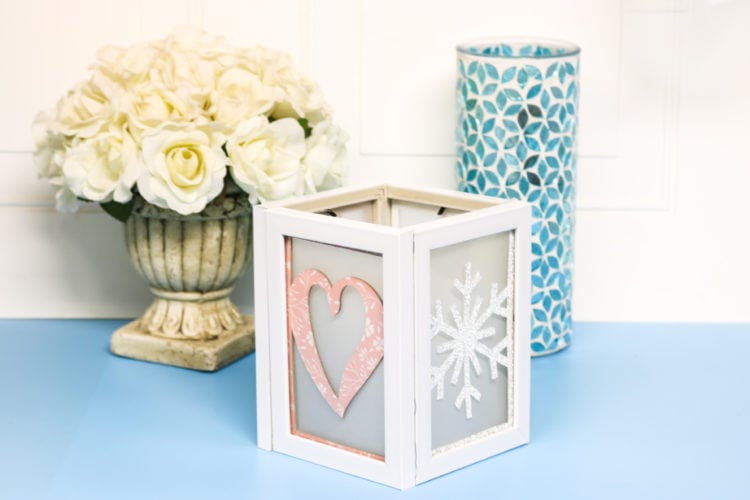
Update: You may also love this Seasonal Luminary that celebrates the seasons! Highly customizable and you can just rotate for the new easy! Multi-tasking home decor!
Uses for picture frame luminaries:
- Handmade gift idea – Father’s Day, Mother’s Day, Christmas
- Centerpieces for Weddings, bridal showers, baby showers, birthday parties
- Home decor – mantel, side tables, shelves
- Party Decor – Graduations, Birthday parties, retirement celebrations.
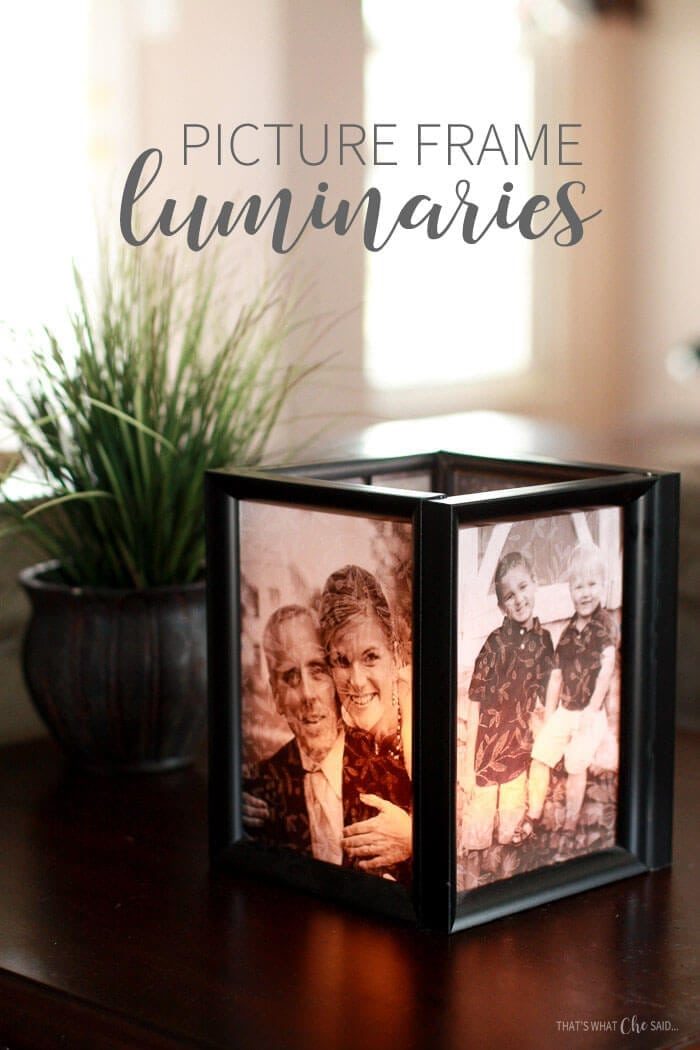
And here it is lit at night! How cool?!?!? What a great centerpiece this will be on your holiday table or mantel!
Some other great handmade keepsake ideas to try:
- Thumbprint Heart Pendant Charm
- FootPrint Butterfly Placemats
- Gratitude Journal
- Thumbprint Ornament
- String of Lights Fingerprint Frame

This post was originally part of my yearly 25 days of Christmas Series! Be sure to sign up for my emails so you get all the current year’s posts for free, to your inbox!
You might also like this Thumbprint Christmas Light Frame
PIN THESE PICTURE FRAME LUMINARIES:


Comments & Reviews
Kelly says
I’m confused. Do you have a video? Just confused on what order to put the pieces
Cheryl Spangenberg says
Hi Kelly, Frame face down, vellum face down, glass, secure frame clamps. Repeat for other 3 frames!
Michelle says
Hi Cheryl! Is there some kind of bottom in the middle of the square, where i place the candle on?
Thank you for your reply :-)
Cheryl Spangenberg says
Hi Michelle, it is the square mirror!
Monet says
Thank you! I love this! Can we say Christmas gifts?!!
Cheryl Spangenberg says
They make the perfect gifts!
Monet says
Did you get the square mirror from dollar tree too?
Cheryl Spangenberg says
Sure did!
Jacqueline says
How do we know what size for square mirror?
Cheryl Spangenberg says
Hi Jacqueline, that depends on the size of frames you use. They will make a square so if you are using a 5-inch width frame you will need a 5″ mirror. If you use 4 inch frame you will need a 4″ mirror. The frames I used in this project are still sold at Dollar tree along with the same mirror I used!
Susan A. says
Wow! The project looks great, but also, I never knew about HP Instant Ink before. That looks like a great option for us! Thanks and best wishes!
Cheryl Spangenberg says
It is a lifesaver!
Yvonne says
I really want to make this this. So beautiful and I just love it.
Cheryl Spangenberg says
I’m so happy you love it, Yvonne!
Gerene Hackney says
Did you Mod Podge the vellum on the front of the glass? If not, how do you get it to stay close to the glass?
Cheryl Spangenberg says
I did not, when the prongs on the framed are closed, the vellum was tight against the glass.
Donna M Barry says
do you think its better with colored or b and w?
Cheryl Spangenberg says
I prefer the black and white but you can do what you prefer!
Rabecca Forbes says
Thanks for this gorgeous idea, I love it!!
I don’t personally have a printer, so I need to know if I would have these printed on laser or inkjet printer?
I REALLY want to make several of these!
Also, I would use a battery operated candle, like the ones from DT. Fire safe and work just as well!
Happy Holidays!!
Cheryl Spangenberg says
You would use inkjet. The laser would probably melt the vellum!
Andrea says
Can I scan the picture to print on the vellum
Cheryl Spangenberg says
If your scanner does quality work, I would think that would work? I am not sure though, never tried it myself.
Michelle says
Where in the store do you find the vellum?
Cheryl Spangenberg says
It’s normally in the same asile as the scrapbook paper racks.
Andrea says
What other paper can we us if we can’t use vellum paper?
Teresa says
Do you let each side of the frame dry before gluing the next frame or do you glue them together at the same time? How do you hold them together while they dry?
Cheryl Spangenberg says
Teresa, I glued them all at once. Once set in the box shape, they held up just fine on their own but you can also use a glue bottle or similar to prop up behind them if needed.
Adam says
Hi, just wondering, when you printed the photos onto the vellum, did you choose standard printing or photo printing?
Thanks!
Cheryl Spangenberg says
Ohhhh Adam…I made this project so long ago I cannot remember that detail. If I had to guess, I would assume I used standard printing because I am not the best at remembering to adjust settings or move them back afterward!
Senaida says
Hello!! I absolutely love this! Is there a video I can see?
I don’t own a printer so I’m not sure how doable it would be.
Sharee says
How essential is the mirror and could a reflective card be used instead?
Cheryl Spangenberg says
Sharee, you could omit it! It does help reflect the light but if you use a newer battery-powered tea-light those seem to be pretty bright!
Amanda says
I made this luminary with Dollar Tree frames an it turned out great. Giving it as a bridal gift.
Cheryl Spangenberg says
Yay! I am so happy to hear this!
Katie Powell says
Hi – I love this idea!! I am just wondering if the frames are wood or plastic? Thanks! I look forward to making some!
Cheryl Spangenberg says
These particular ones were plastic but I have made them with wooden ones also. The main thing to look for is a frame with straight vs. beveled sides! The beveling makes it so tricky to get them to stay together.
Bonnie says
Do it have to be laser ink or regular? To print on vellum?
Cheryl Spangenberg says
Inkjet works best! Laser printers run the risk of melting the vellum.