
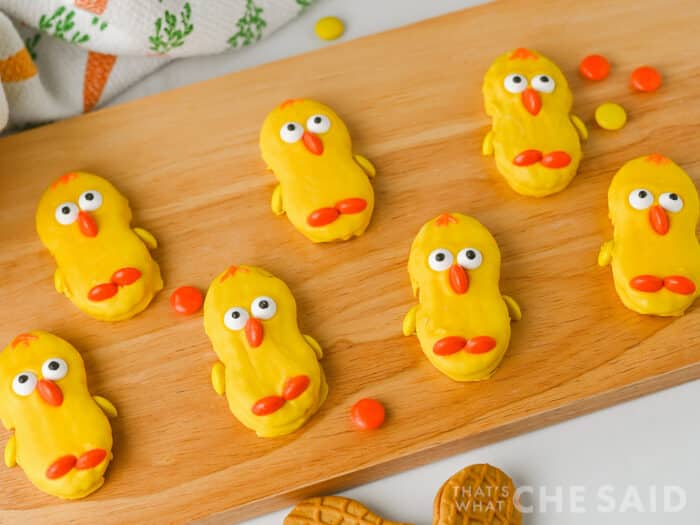
If you’re looking for a cute, no-bake Easter treat that’s as fun to make as it is to eat—these Nutter Butter Chick Cookies are about to steal the show! With just a handful of ingredients and simple decorating steps, you can turn ordinary cookies into the most adorable little springtime chicks.
Why You’ll Love These Easter Chick Cookies
- No baking required
- Kid-friendly (perfect for little helpers!)
- Bright, cheerful, and festive
- Ready in about 30 minutes
- Great for parties, baskets, or gifting
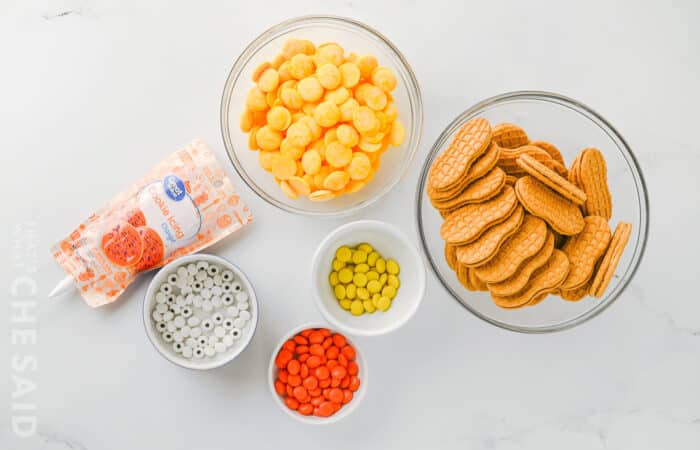
Ingredients You’ll Need
Here’s everything you need to bring these little chicks to life:
- 16 Nutter Butter Cookies
- 1 (12 oz.) bag yellow candy melts
- 32 candy eyes
- ~¼ cup orange Reese’s Pieces
- ~¼ cup yellow Reese’s Pieces
- Orange cookie frosting
How to Make Nutter Butter Chick Cookies
- Prep Your Workspace – Line a baking sheet with parchment paper and set aside.
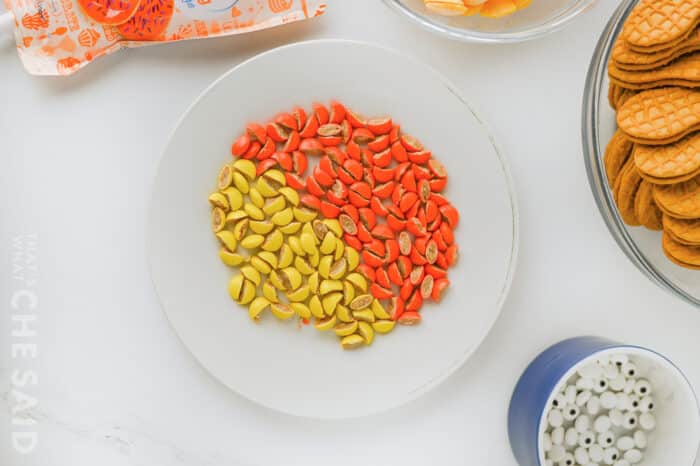
- Prep the Candy Pieces – Carefully cut the Reese’s Pieces in half using a sharp knife. The orange pieces are beaks and feet and the yellow pieces are for the wings.
- Melt the Candy Melts — in a microwave-safe dish, microwave the yellow candy melts in 30-second increments, stirring between each round until smooth.
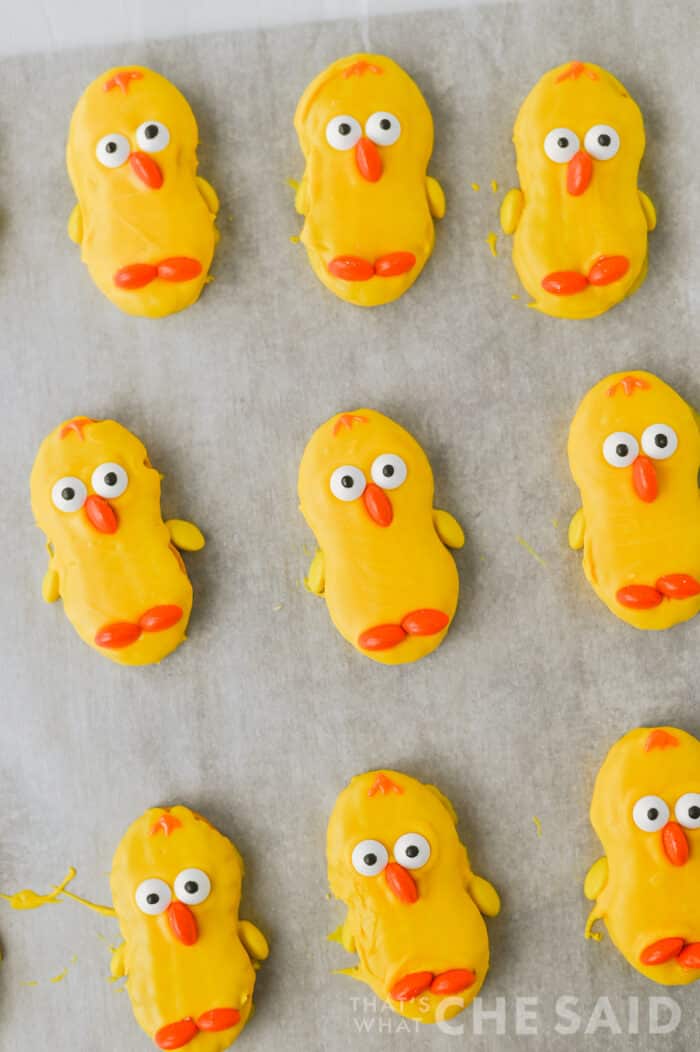
- Dip the Cookies – Using a fork, fully coat each Nutter Butter cookie in the melted candy. Let excess drip off before placing on the parchment-lined baking sheet.
- Decorate Quickly – working in small batches, before the coating sets, add 2 candy eyes, 1 orange beak, 2 orange feet and 2 yellow wings.
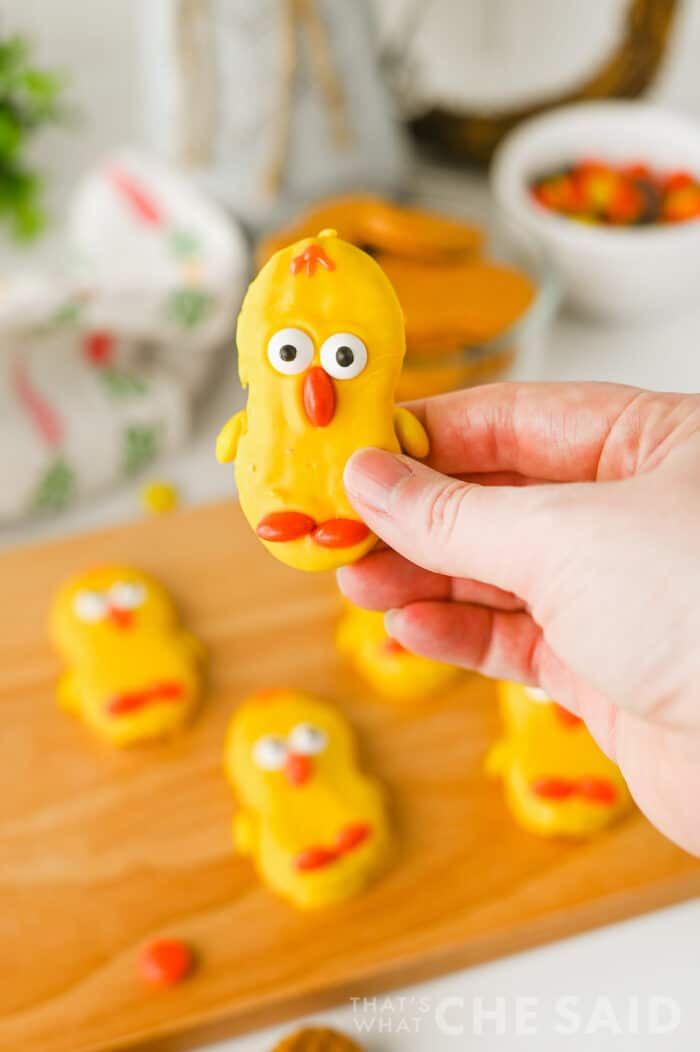
- Add Chick “Hair” – using the orange cooking frosting, pipe a tiny tuft of hair on top of the cookie!
- Let Set – Allow the cookies to sit on the countertop until the yellow candy melt is fully hardened, about 10-15 minutes. You can speed this process up if you place the cookies in the refrigerator.
💡 Tips for Success:
- Work in small batches so the candy coating doesn’t harden too fast
- Use a fork or dipping tool for smoother coating
- If candy melts thicken, reheat in short bursts and stir well
- Place decorations immediately—timing is everything!
How to Store Nutter Butter Chick Cookies
- Room Temperature: Store in an airtight container for up to 5 days
- Refrigerator: Not necessary, but can extend freshness slightly
- Freezer: Freeze in a single layer, then transfer to a container for up to 2 months
Place parchment between layers to prevent sticking or smudging.
These Nutter Butter Chick Cookies are the definition of easy + adorable. Whether you’re hosting Easter brunch, filling baskets, or just making memories in the kitchen, this recipe brings a whole lot of joy with very little effort.
And let’s be honest… anything this cute deserves a spot on your Easter table. 💛
Be sure to pin these cute Turkey Nutter Butter Cookies for Thanksgiving!

Nutter Butter Chick Cookies
Ingredients
- 16 Nutter Butter Cookies
- 1 12 oz. bag of yellow candy melts
- 32 candy eyes
- 1/4 cup orange reese's pieces, cut in half
- 1/4 cup yellow reese's pieces, cut in half
- Orange cookie frosting
Instructions
- Line a baking sheet with parchment and set aside.
- Take the reese’s pieces, and use a sharp knife to carefully half each one.
- Start by melting the candy melts. Microwave for 30 second increments, stirring well in between, until melted.
- Coat the Nutter Butter cookies with the melted candy.
- As you go, quickly add two candy eyes, half an orange candy for a beak, two halves for feet, and two yellow halves for arms for the chicks.
- Allow the chicks to set, until the candy is solid.
- Take the orange cookie frosting and draw a little hair on the top of each chick.
- Allow this to set, and then enjoy.
Notes
- Work in small batches so the candy coating doesn’t harden too fast
- Use a fork or dipping tool for smoother coating
- If candy melts thicken, reheat in short bursts and stir well
- Place decorations immediately—timing is everything!
- Store in an airtight container for up to 5 days at room temperature. Refrigeration is not necessary, but can extend freshness slightly.
- Freezer: Freeze in a single layer, then transfer to a container for up to 2 months. Place parchment between layers to prevent sticking or smudging.


Leave A Reply!